Stage III Anesthesia Simulation
Quick Start Guide
(Downloadable Here)
After downloading, double click on the Stage III installer file (StageIII.msi) to install the software onto your PC. Depending upon you system configuration you may need administrative privileges to install or remove the software. The installer creates a desktop and Start Program Menu short-cut from which you can launch the software.
PC Setup:
The Stage III simulation is designed to run on PC computers having Windows 7 SP 1 or greater as their OS and a video driver having outputs for two monitors.
The simulation has been designed to display separate instructor and student screens on two different monitors using the extended desktop configuration of your system.
To setup extended display press the Windows Key + P and select Extend. This setting effectively extends your display across your two monitors. Launch the program and drag the instructor display to the monitor you wish to use as a controlling display then drag the student display to the monitor you wish to use as the student simulation display.
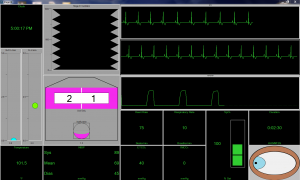
This arrangement allows you to control the simulation while the students see only the vital signs monitor display.
Manikin:
The simulation environment is designed to be manikin independent and will work with any manikin the user purchases or creates.
A suite of manikin enhancements (eye touch, heart sounds, palpable pulses, ET tube placement, and more) that integrate with the simulation software and automate much of the instructor control are currently being beta tested and will be available in the near future.
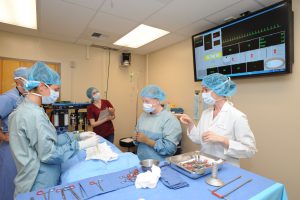
The simulation environment uses a variety of readily available props to enhance realism. A surgery table, instrument tray, anesthesia machine and vital signs monitor are helpful if it is desired to emulate a surgical environment.
As the student connects vital signs monitors and adjusts the vaporizer and flow meters the instructor effects the changes via the instructor control screen providing the illusion of a living patient.
Starting a Simulation:
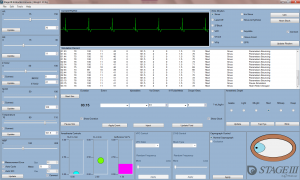
To start a simulation click the “Start Sim” button on the instructor display; the duration indicator begins counting upward and the ECG and Capnograph waveforms begin moving on the student vital signs display.
To pause the simulation at any time click the “Pause Sim” button; the duration counter and the waveforms stop moving. This feature allows you to incorporate a “time-out” into your simulation session to guide progress or emphasize a point.
If you haven’t loaded a Simulation Setup file, default values for physiologic variables are used:
HR=40;RR=10:SpO2=100;Temp=70F;ETCO2=40;IMCO2=0;S/M/D NIBP = 90/70/50).
Most vital signs parameters need to be “Connected” before they are displayed to the students.
An example is the pulse oximeter, even though the default value of 100 is displayed on the instructor screen the student vital signs display will only show 3 dashes (—) until the student connects the pulse oximeter probe at which time the instructor can check the “Connect” tick box and have the SpO2 value displayed to the student along with a stack of pulsing led bars corresponding to the pulse rate.
Two vital signs parameters (HR, RR) are always connected thus the HR will always be displayed on the student vital signs display but the ECG trace will display a flat line until the “Connect” box is ticked. The Capnograph Trace functions similarly; the RR is always di
 splayed but the capnography trace displays a flat line until “Connect” is ticked.
The Temperature vital signs display is connected by default and displays a default value of 70F. When the student inserts the temperature probe into a manikin the instructor changes the displayed temperature value.
As the student connects the various monitors on the manikin, the instructor ticks the appropriate “Connect” box rewarding the student with the vital signs parameter.
When connected, the NIBP vital signs monitor will display only 0 for S/M/D pressures until the student activates the “start” button on the prop monitor. The instructor then clicks the “Update” button and the student vital signs monitor will turn grey to indicate that the NIBP monitor is taking a reading. After a short time interval values for S/M/D pressure are displayed on the student vital signs monitor display.
Note:
The instructor can choose to change vital signs parameters & waveforms on the fly or run a preprogrammed scenario with the ability to cancel the scenario at any time and take over control.

